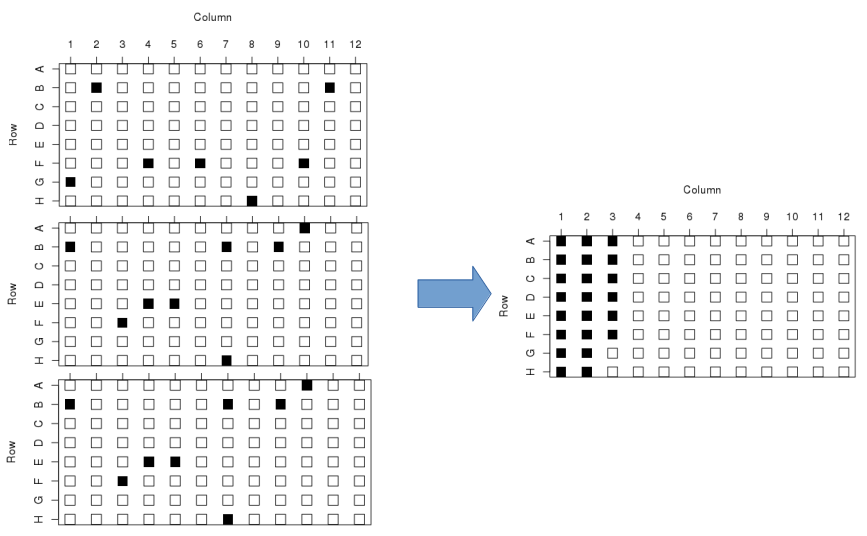
Rearraying is the process of transferring hits from one or more plates into a new plate set. Hits are transferred in sample id order, into plates by column. In the example below, hits are the black wells across 3 plates, being transferred into a single plate:

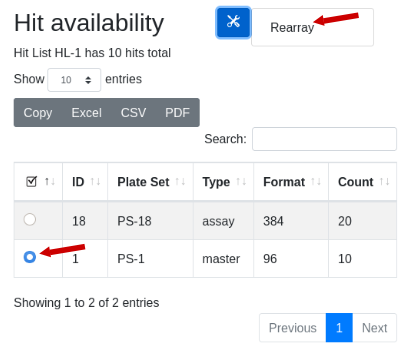
To initiate a rearray operation start by navigating into a hit list by clicking on the hit list URL. Scroll down to see the list of plate sets that contain the hits of interest. Here I am looking at HL-1:

Note there are 10 hits total. Two plate sets are suggested, but the 384 well plate set is a transient assay plate that contains the hits in duplicate. Use the plate type as a guicde as to which plates might contain the samples. The master plate set PS-1 is selected. Under the tools icon select ‘Rearray’:

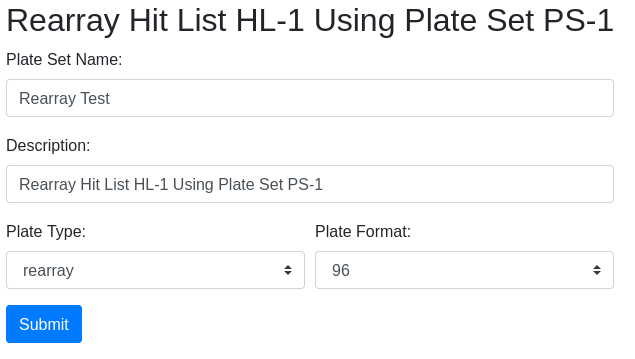
The rearray form will appear, with an auto-generated description which you can edit. Fill in the required information and click ‘Submit’.

Confirm the information and select the controls layout. You are then directed to the plate set page where you can see the new plate set PS-20 of hits:

| Field | Description |
|---|---|
| Name | freeform text, a descriptive name |
| Description | auto-populated but editable |
| Format | 96, 384 well plates are possible destination formats |
| Type | Rearray suggested but user selected |
| Sample Layout | Choose a layout; layout “description” appears in this dropdown |
In the plate set view, the newly created PS-20 in PRJ-1 is visible with its informative description. There is also a worklist associated with the plate set because it was created using a rearray operation.

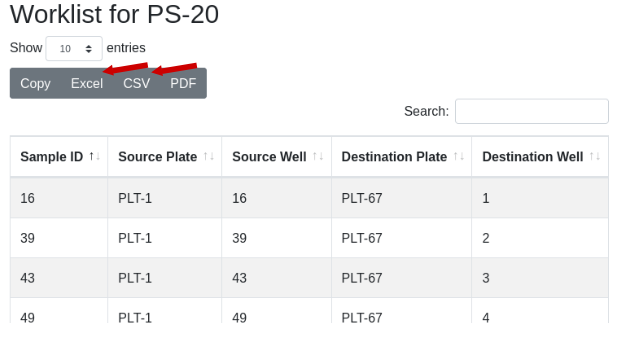
Generate a view of the worklist:

Now to physically transfer the samples from PS-1 to the new plates of PS-20, export the worklist to Excel and import into a liquid handling robot to run the transfer:
